

TL;DR
If you are wondering about how to turn a blog post into a YouTube video, then do not paste the full article into an AI tool at the very first. My recommendation is to pick a strong blog post with unique value and then use the Fliki AI blog-to-video generator to create the voiceover, visuals, and captions. This gives you a faster blog-to-video workflow without creating generic AI videos that only read your article aloud.
Introduction
I have been a content creator for the last few years, and I know the importance of repurposing my content into a video format.
There was a time when I usually jumped from one blog to video maker to another and became frustrated with the output because back then I was treating a blog like a script.
That was why the final video felt flat, stock-footage-heavy, and AI-generated.
As we all know, a good YouTube video needs a hook, pacing, B-roll, voice, captions, and a human point of view because people do not watch your videos the same way they read your articles.
So, if you already have a bunch of blog posts, this workflow will help you repurpose them very easily.
Here, you’ll learn the entire process of how to choose the right blog post and create the video with Fliki and turn one blog into more YouTube shorts, long videos, and social clips.
So, let’s start
Table of Contents
Why Repurpose Blog Posts Into YouTube Videos?
If you have already spent hours researching, writing, editing, and ranking a blog post, turning it into a YouTube video helps you get more reach from the same idea.
Here, the reason is quite simple because some people will never read your article, but they will watch a video on the same topic.
Furthermore, YouTube also gives your content another search channel, another discovery surface, and another way to build trust with viewers who prefer voice, visuals, and examples over long text.
But this only works when you repurpose the blog properly.
A YouTube video is not just the article read aloud with random stock footage. It needs one clear hook, a tighter message, visual pacing, captions, and a reason for the viewer to keep watching.
That is where a tool like Fliki, a blog to video maker, can help you to execute the final barrier.
Here, you can turn your blog articles into YouTube videos faster by using AI voiceover, captions, scenes, and the right visuals, while still keeping control over the script and core message.
So the goal is not “make a video from a blog in 60 seconds.” The real goal is to turn a strong blog idea into a YouTube video people actually want to watch.
Blog vs YouTube: Why You Should Turn a Blog Post into a YouTube Video
I want to make this part very clear because a blog is built to satisfy a different purpose than a YouTube video.
You know that reading the full article word-for-word usually feels slow, flat, and boring for some people. This is why YouTube videos are the safest choice to go with for content creators like us.
In 2026, viewers need a hook, a quick movement, examples, B-roll, captions, and a clear reason to keep watching your YouTube video.
So before you turn a blog post into a video, reshape it by keeping the main idea and changing the format.
That’s the main point, and to do this, you need to follow some steps that are crucial enough to make your YouTube video way more fresh and useful than others.
How to Turn a Blog Post into a YouTube Video: A Step-by-Step Process
Here are some steps to follow to make a branded video production workflow with the help of Fliki.
Step 1: Choose the Right Blog Post
This is the main part, and I mean, the foundation of this entire blog to video workflow.
People generally choose any blog posts that are available to them, but this is not the right approach.
Instead, I would say that you should always start with a blog post that already has a clear main idea, search demand, or proven engagement.
I would not recommend that you to pick a random article just because it exists. Always choose a post that answers one strong question, solves one specific pain, or has a hook people would care about on YouTube.
Specificity should be the topmost priority in 2026 because human behaviour has changed drastically, and if you are not specific, then you’ll definitely face a hard time in the near future.
However, if one of your blogs is too broad, just split it into smaller YouTube videos, and in that way, your one article can become several YouTube Shorts or one long YouTube video.
Step 2: Create the Video with Fliki
Now, I want to complete this process with Fliki, one of the best blog post to a YouTube video makers in my observation.
Here, I would like to keep it simple so that you can execute it frequently without creative burnout. Just follow the process below, and you’ll get a better output.
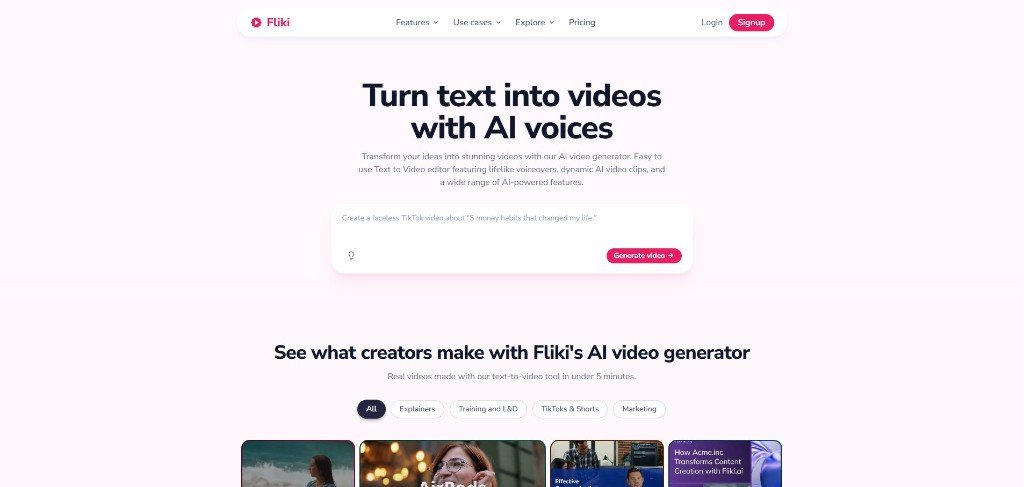
Visit the OFFICIAL SITE and sign up to get the 3 credits to test this blog to video generator for free.
Now, it will open a window where you can find multiple video workflows, including blog to video.
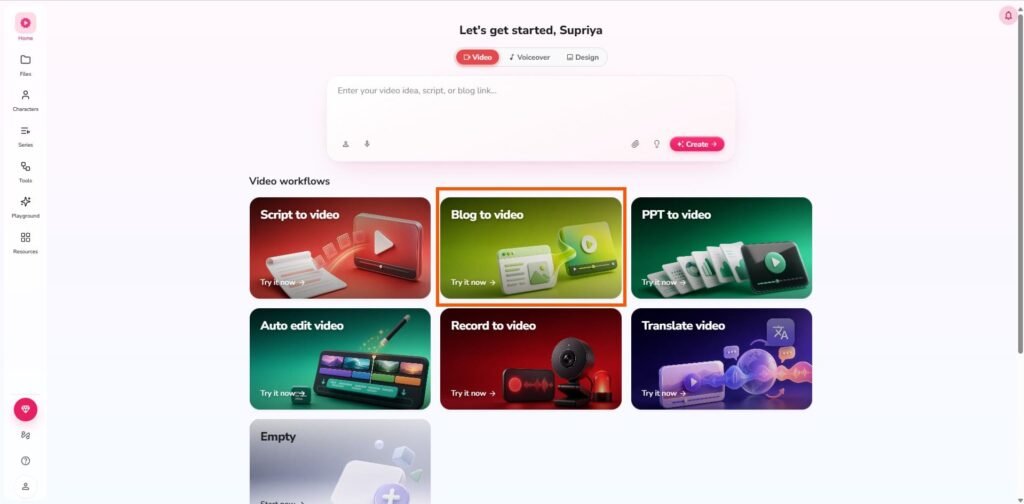
Simply click on blog to video, and it’ll open a dedicated place where you can turn articles into videos by adjusting some options.
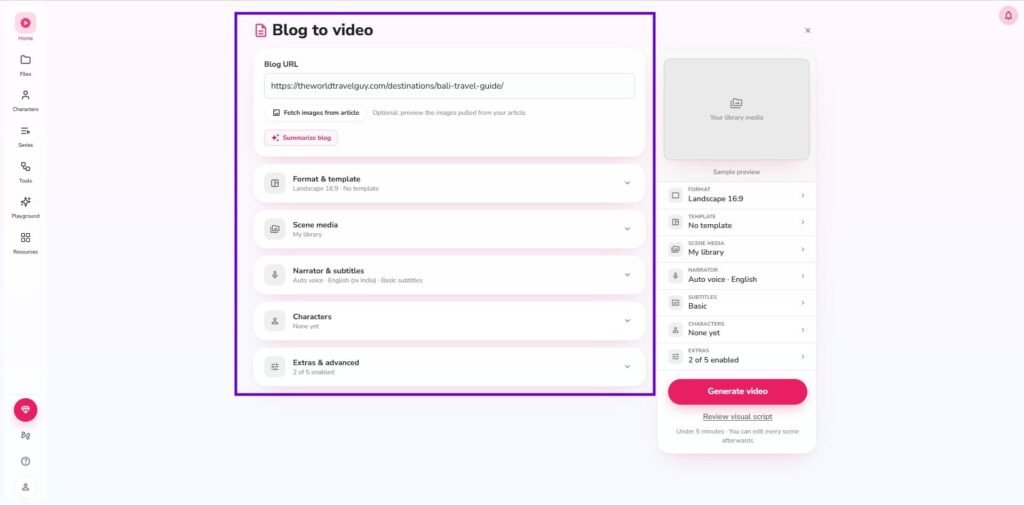
This is the blog to video dashboard with plenty of useful options for branded video production. These options includes
- Blog URL section
- Format & Templates
- Scene Media
- Narration & Subtitles
- Character
- Extras & Advanced
Blog URL section
As you can see in the above screenshot, I have already pasted the blog post link, and now it’s time to adjust some settings.
But before that, I want to introduce you to an interesting part: the ‘fetch images from article’ and ‘summarise blog’ buttons, located just below the blog URL section.
I personally liked the ‘fetch images from article’ option because it can make your YouTube video look genuine rather than just a stock footage library.
When you click that button, it will automatically pull all your original footage from that blog post.
Format and Templates Section
Now move to this section, and here you can set the format of your YouTube video along with a template.
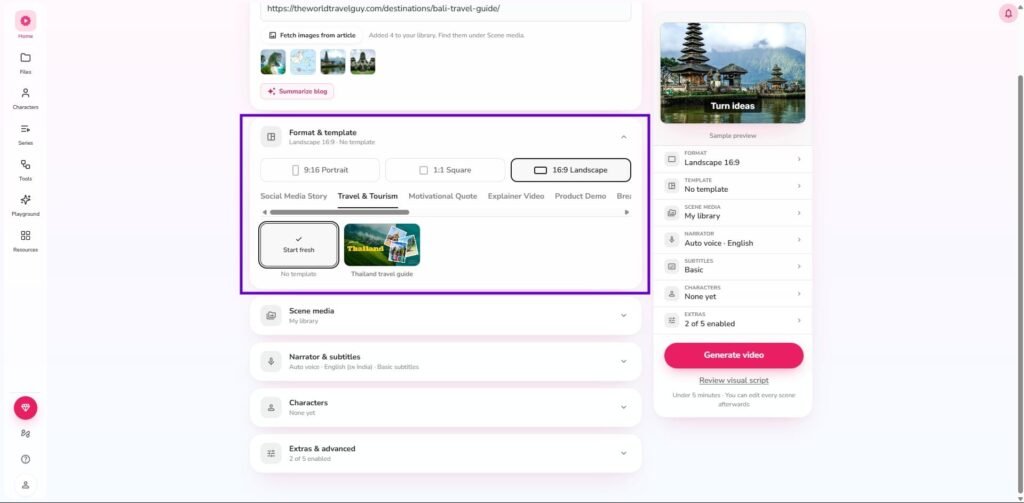
Fliki offers multiple templates for different types of videos, and you can choose the best template from those options.
However, if you don’t find any, then you can select the ‘Start fresh’ option.
As I am going to create a YouTube video from a travel guide blog post, I select a travel & tourism-based template.
Now, let’s move to the next section.
Scene Media Section
This is the visual section, and you can control your YouTube video visuals by choosing stock media, AI images and your own library images.
You can add many images of your own if you like to show rather than just stock footage.
I select the stock media option to make this video.
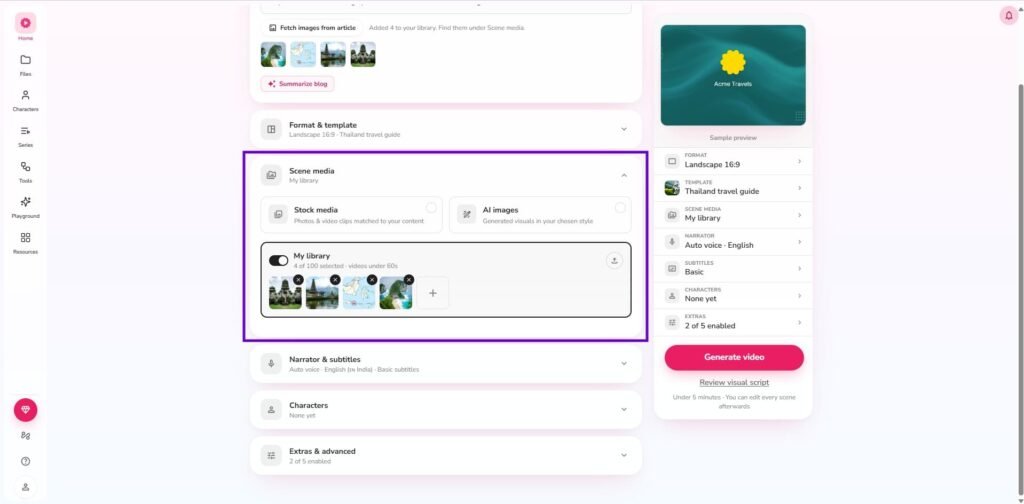
Now, move to the next part.
Narration & Subtitles
This section is very simple. Here, you can select voices that fit your content.
Fliki AI has a huge range of human like ai voiceover, and in my observation, they are actually useful and feel natural.
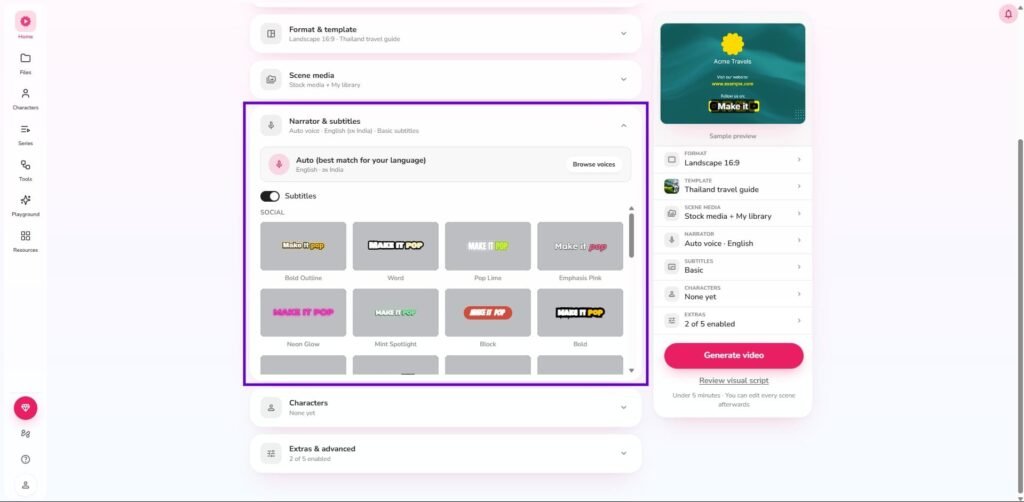
From here, you can also select the subtitle.
I select a ‘United States’ dialect voiceover as I am targeting those people, and also select a subtitle design for this video.
Now, move to the next part.
Charater
As I am going to make this a faceless YouTube video, I don’t need any character.
However, if you think that your video needs an AI avatar to appear in some of the key scenes, then you can easily add your human-like avatar to your video.
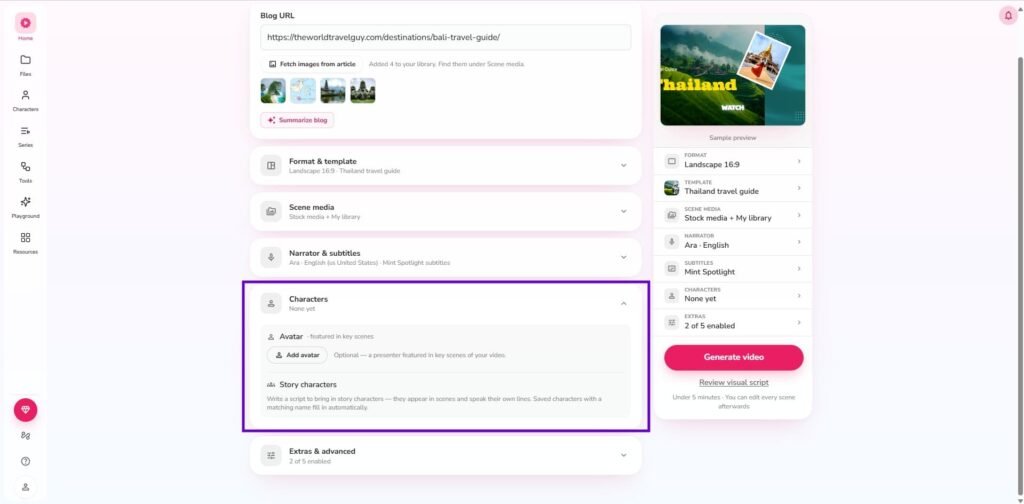
Now, let’s move to the final section
Extras & Advanced
If you want to use this feature, you need a paid version of Fliki, which will cost around $28/month.
Basically, this section allows you to add your brand kit to your video automatically.
I don’t think you need this part at the beginning. So, just leave this as of now.
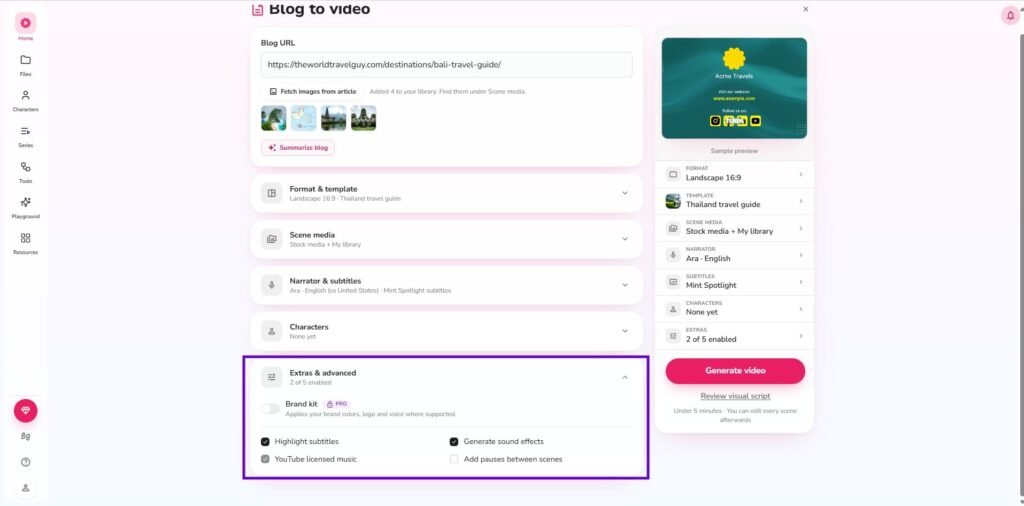
Now, we’re ready to generate the video in the initial section and to be honest, it takes around 1 minute to adjust these options.
To me, this is very simple, and anyone can execute this without any hesitation.
However, here is one thing that grabs my attention, which is the ‘Review visual script’ option.
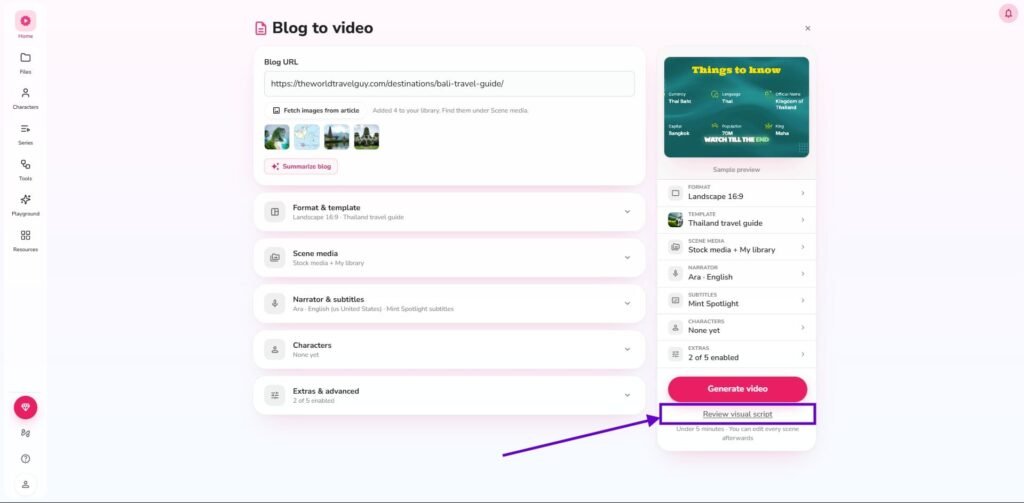
Review Visual Script
This is a very useful feature, I believe, specifically when you create a video from photos and want to establish full control over those visuals.
To test the usefulness of this feature, I click this option, and it takes nearly 30 sec to open a new window.
Look at the screenshot below, as I want to clarify something here in this section to you.
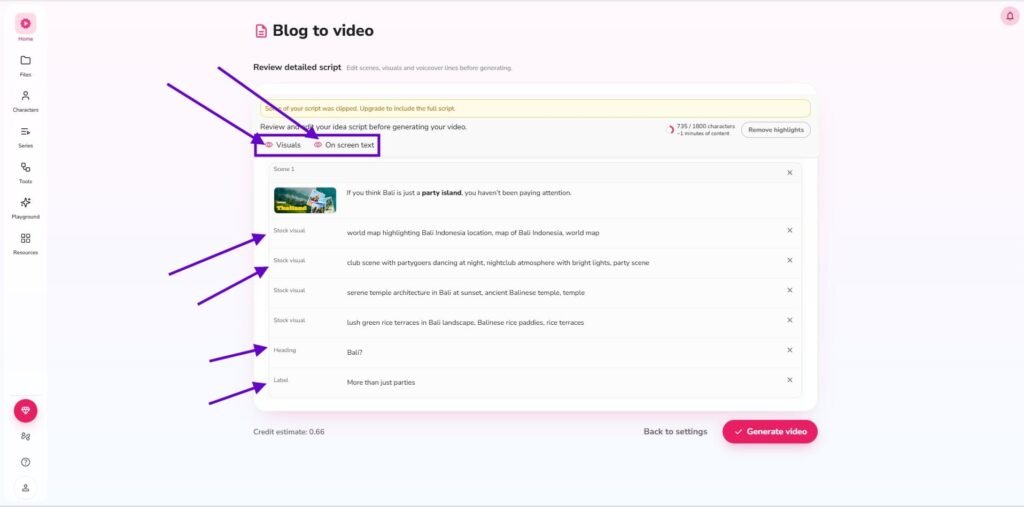
This visual review section will help you to
- Understand stock visuals in each scene
- See the text heading and also see the text on the screen
- And delete anything that feels like unfit to your video.
Plus, you can literally see the credit estimation to generate these scenes, as in my case, it needs 0.66 credits, which is fine.
So, after checking all of these, hit ‘Generate video’.
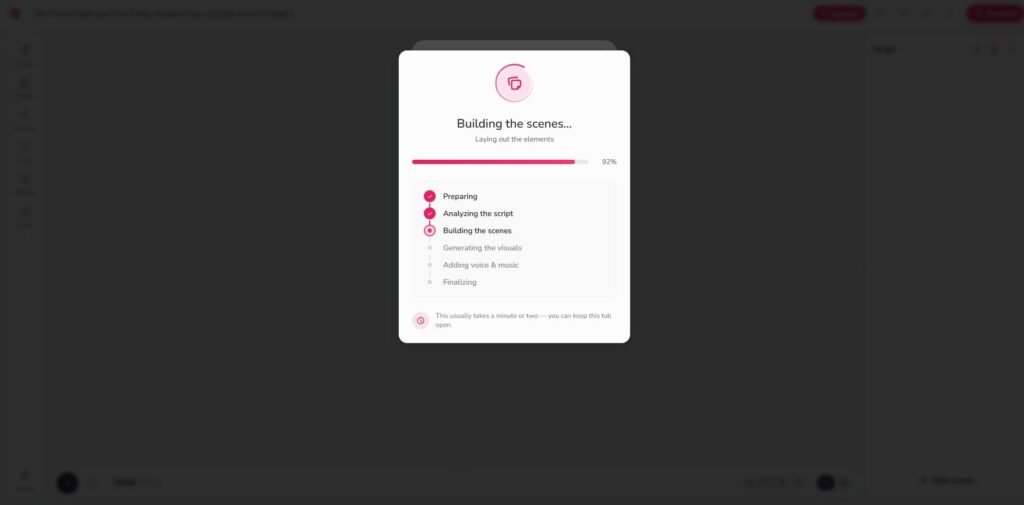
Now we’re entering the video editing section to polish my video with some cool editing features.
Step 3: How to Edit Videos for YouTube: Create a Video from Photos
Now, we’re at the video editor section, and the dashboard looks very clean, and you can easily navigate each of the settings.
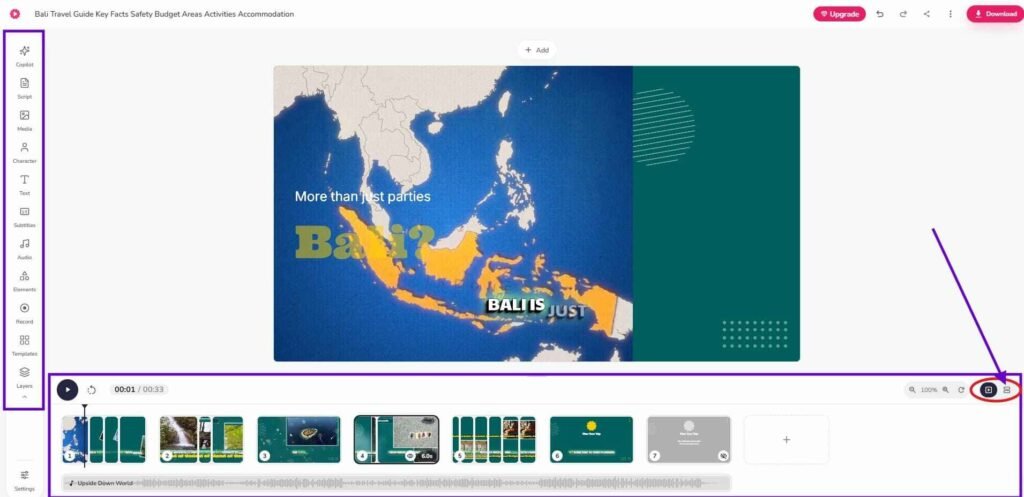
On the left side, you can see the main options that a YouTube video editor needs to create a video from photos.
As seen in the screenshot above, you can notice the video editing timeline just below the preview section and in the right corner, I have marked an arrow that allows you to see the detailed timeline view to do fast YouTube video editing.
Now, I would like to show you some features of this video editing dashboard
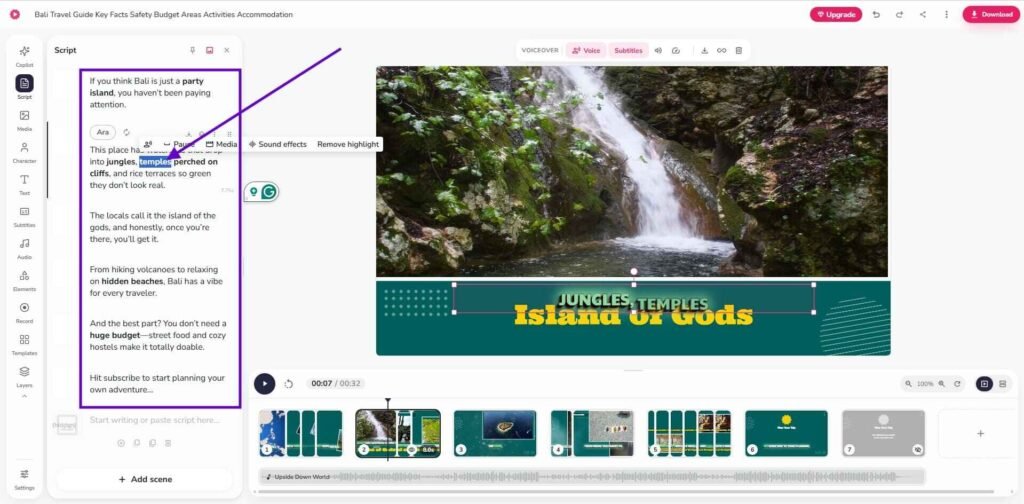
- If you want to remove any text from the script, just select that word and press delete on your keyboard, and it will automatically adjust the clips. I have seen this feature in Descript, a text-based AI video editor.
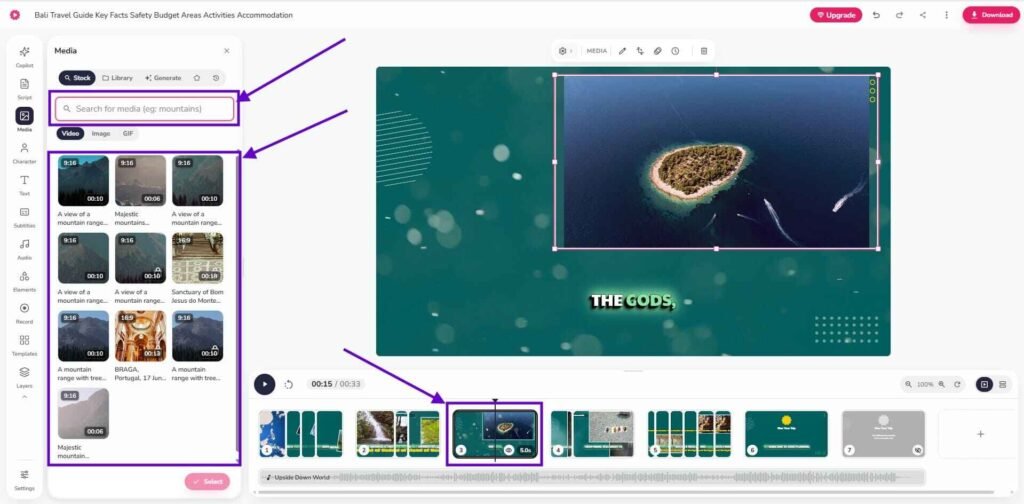
- If you want to change video footage or want to add a new clip, simply double-click on the scene on the timeline or double-click on the video clips on the timeline, and it will automatically open the stock video library on the left sidebar along with a search bar. You can select from those or search for the right video clips and finally add them to the scene by clicking the plus button.
- If you want to modify video clips, you just need to select that clip, and it will automatically open a properties window on the left side. You can make changes from there.
See the screenshot below
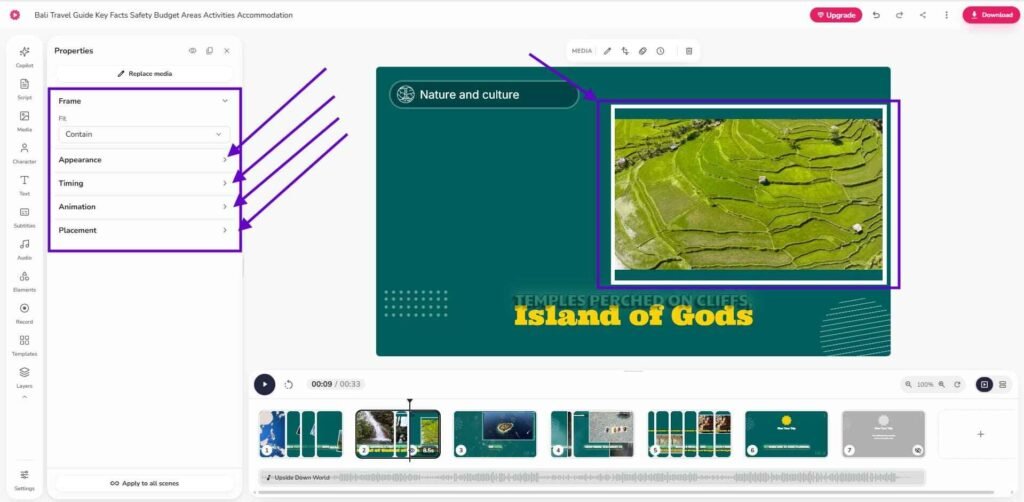
Here, I want to highlight the timing section because I know you need this feature to control the screen timing of your clips.
Apart from these, it’s just a drag-and-drop video editing app, and anyone with basic knowledge can edit videos with Fliki.
So, the entire video takes around 2 minutes to prepare from scratch, and this is how you can easily turn a blog post into a professional video.
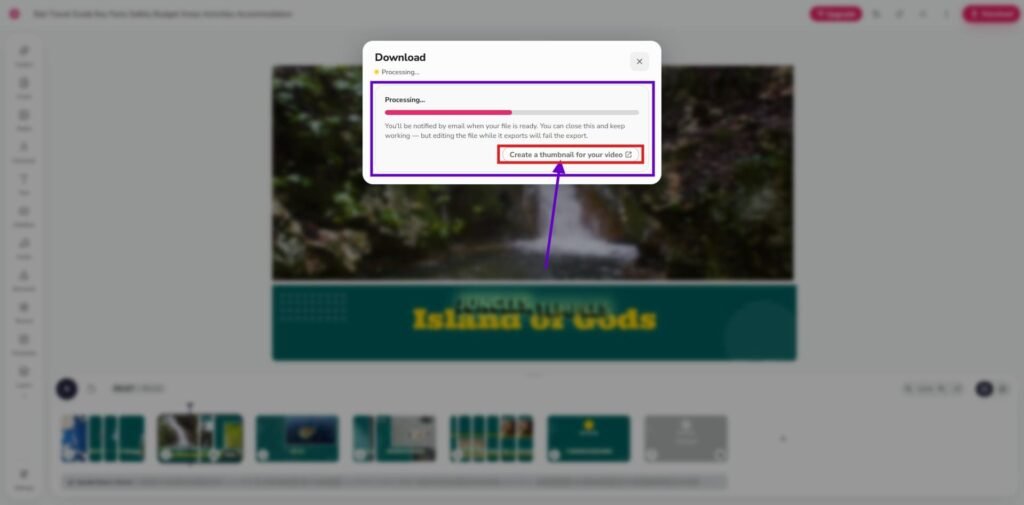
Now, just click the download option, and you are ready to publish on your YouTube channel.
Step 4: Create a Thumbnail and Title
As you can see in the screenshot, Fliki also offers to create a YouTube thumbnail.
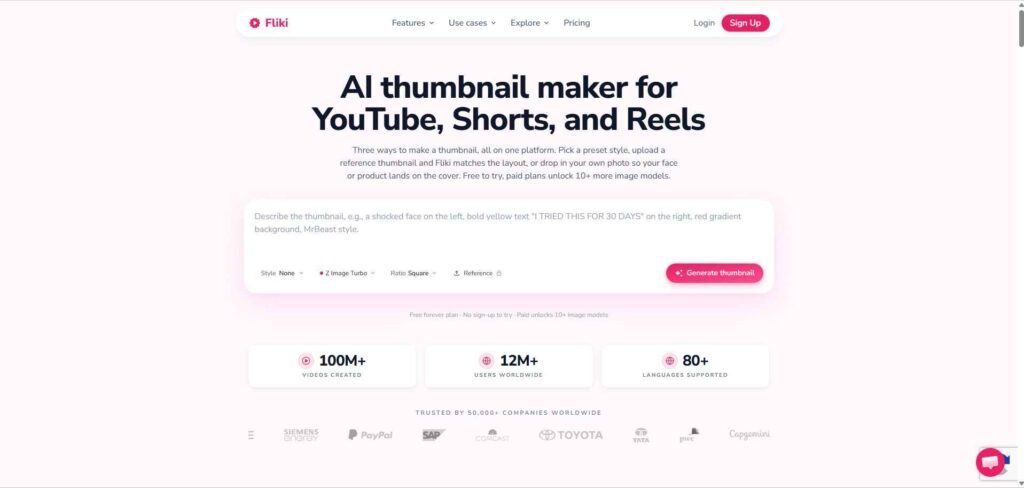
You can select that option to create one for your YouTube videos, or you can make a thumbnail from Canva or Photoshop.
I generally use Canva to execute all of my thumbnail-related tasks. However, you can use Fliki also.
So, here is the video I have made in just 1.5 to 2 minutes. However, I believe you can easily produce far more attractive output by using some effects and all those items.
Step 5: Add Human Touch
This is crucial in the age of AI because if you don’t add any human element, then the video would likely feel flat with no emotion.
So, while turning articles into videos, always try to add a human touch, like you can add your own clips or some photos to your video.
This activity will create authenticity over time because you are not just making a video, but you are creating a product that will stay forever on the internet.
So, you can consider this a best practice while creating a video from photos using an AI blog to video tool.
Step 6: Publish and Optimise for YouTube SEO
Creating a YouTube video from a blog post is useless if you aren’t able to distribute it properly with the help of YouTube SEO because nobody appreciates an invisible piece of content.
So, the best way to do YouTube SEO is by leveraging a tool like VidIQ.
I heavily use VidIQ to conduct keyword research for my own YouTube channel, where I used to repurpose my content.
VidIQ will help you to find low-competition keywords, search volume and, on top of that, it helps you to manage your channel smoothly.
It costs around $5 – $10 per month, and it’s absolutely worth it.
Bonus: Turn One Blog into Five More Videos
This is a bonus section, and I think, as we are talking about repurposing blog content for social media, I would highly recommend you to look at some of the best AI video tools for YouTube shorts.
You can choose one of those and repurpose your video into some shorts to gain maximum reach.
In my opinion, creating shorts looks like making roads that lead to your main home.
So, don’t ignore this.
Common Mistakes to Avoid
Here are some common mistakes that I want to help you avoid when turning articles into videos. These are
- Using all blog posts: Pick one strong blog post instead of covering everything.
- Trusting random visuals: Check every scene so the B-roll matches your message.
- Removing human touch: Add your opinion, voice, face, screenshots, or examples where possible.
- Forgetting the thumbnail: A good video still needs a clear title and clickable thumbnail.
- Making one video only: Turn the same blog to YouTube video into YouTube Shorts.
So, I think I have discussed every aspect of this blog to video workflow, and you can easily execute this to repurpose your blog content.
FAQs of How to Turn a Blog Post into a YouTube Video
How do I turn a blog post into a YouTube video?
Always pick one strong blog post and then use Fliki AI to create a script, voiceover, visuals, captions, and then export the video.
Can I just paste my blog link into Fliki?
Yes, but do not rely on the first draft completely. Review the script, visuals, voiceover, and captions so the video does not feel like reading the blog post.
What type of blog posts work best for YouTube videos?
How-to guides, listicles, comparisons, case studies, and opinion-led articles work best because they already have a clear structure and viewer problem.
Should I make long YouTube videos or Shorts from a blog post?
Use long-form YouTube videos for detailed topics, tutorials, and stories. Use Shorts for one hook, one tip, one stat, or one strong takeaway.